Toto je starší verze dokumentu!
Knowledge Tests
Creation and editing
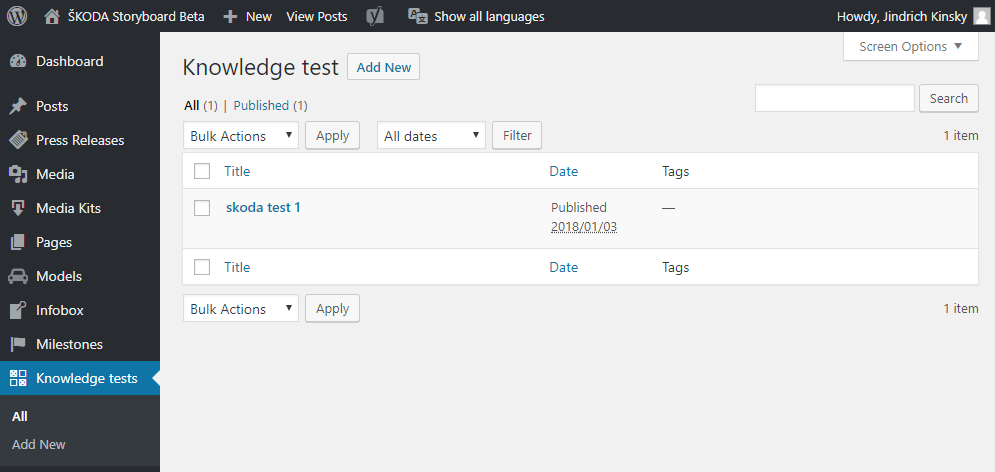
You can find all the existing Quizzes after logging in to WordPress administration. Select Knowledge tests directly from the main menu on the left side. Next, you can see a list of existing quizzes. The interface is just the same as with other components - you can choose an item for editing, or deleting and you can also create a new one.
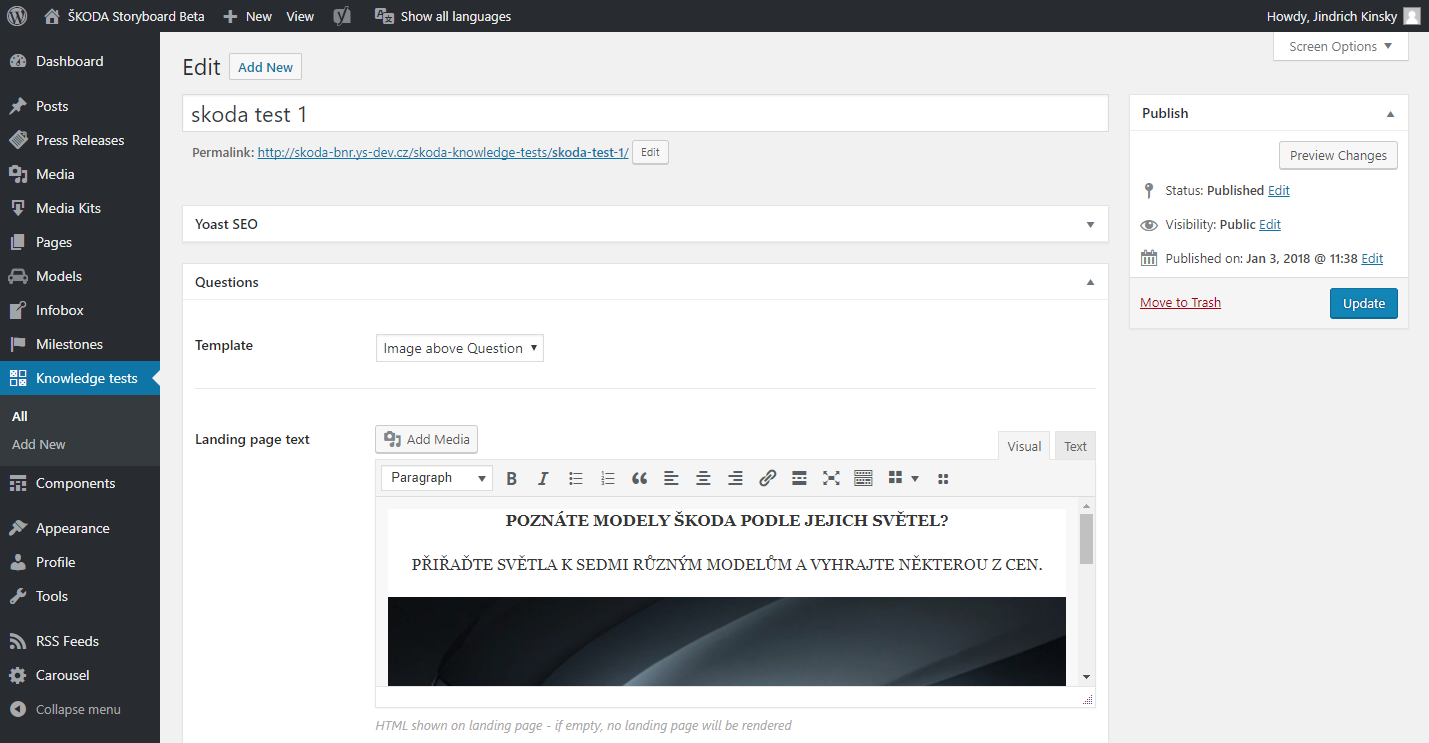
After selecting a Quiz for editation or clicking the button to create a new one you'll be redirected to an interface for single Quiz modifications. Let's look at some of the existing Quizzes so we can describe the form columns you're going to use.
As you can see, there is an obligatory field for the Quiz title. This title is not publicly visible so you can just use anything useful for future identification so other editors can easily recognize one Quiz from another. The next common thing is the right Publish panel which can be used to save drafts and publish new Quizzes.
Let's get back to the main editation field and skip directly to the section called Questions. In this section, there are both mandatory and optional fields. Here is the list:
- Template
- Landing page text
- Input page text
- Result page text
- Result page variants
- Terms and conditions
- Questions:
- Question title
- Answers
- Correct Answer
- Image (optional)
Now we'll look in detail at each of the fields. As you can see, most of the fields do have a short description just under themselves, so you shouldn't have a hard time finding out their function.
1. Template
Template field is used for selecting a Quiz template which is used on the public website. For now you can just skip this field because there is only one template to choose from.
2. Landing page text
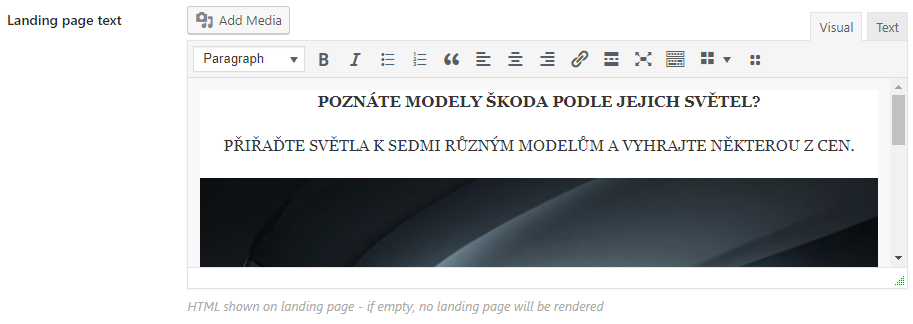
Content of the Landing page text field is shown just before starting a Quiz - directly after loading the Quiz page on the public part of the website. You can use text formatted with HTML as well as images - all is done by using the visual (WYSIWYG) editor. The images are installed through the Media library which is a common component. This field is optional so if you don't enter anything in there the landing page won't be rendered at all.
3. Input page text
This field displays information that is used on the screen right after the visitor completes all the questions. You'll probably want to encourage the user to fill in his/her email address in the email field, so let's enter something along these lines.
4. Result page text
Result page text, as the title says, is displayed also after completing the Quiz. In this section, we can thank the participant for his interest or something like that.
5. Result page variants
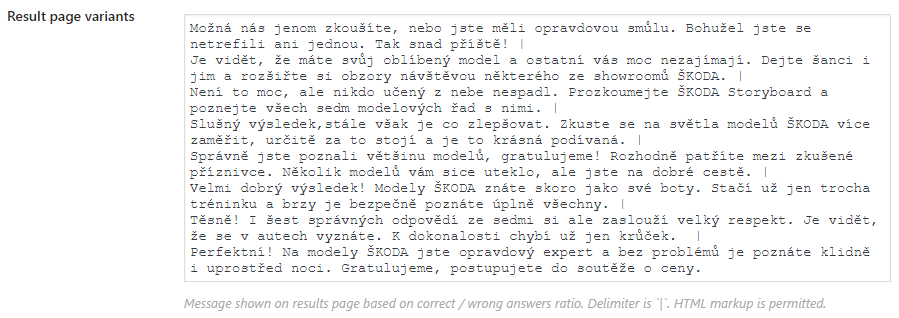
This one is a little bit tricky as you can see below. There is a number of possible results and we're going to inform the participant how he performed in the Quiz. We'll just count all the questions in the Quiz and insert a corresponding number of textual evaluations. We'll just directly insert the text of each message starting from the worse results and finishing with the best one. You just have to press Enter after each of the messages and start on the new line with a next one. There is also one important thing to remember - always insert a space and pipe characters after each message, so it looks something like this:
Sorry, you're the worst! |
Congratulations, you're the best!
Or - as you can see on the image below with some more sophisticated messages:
6. Terms and conditions
This field contains a URL (link) to the page with terms and conditions.
7. Questions
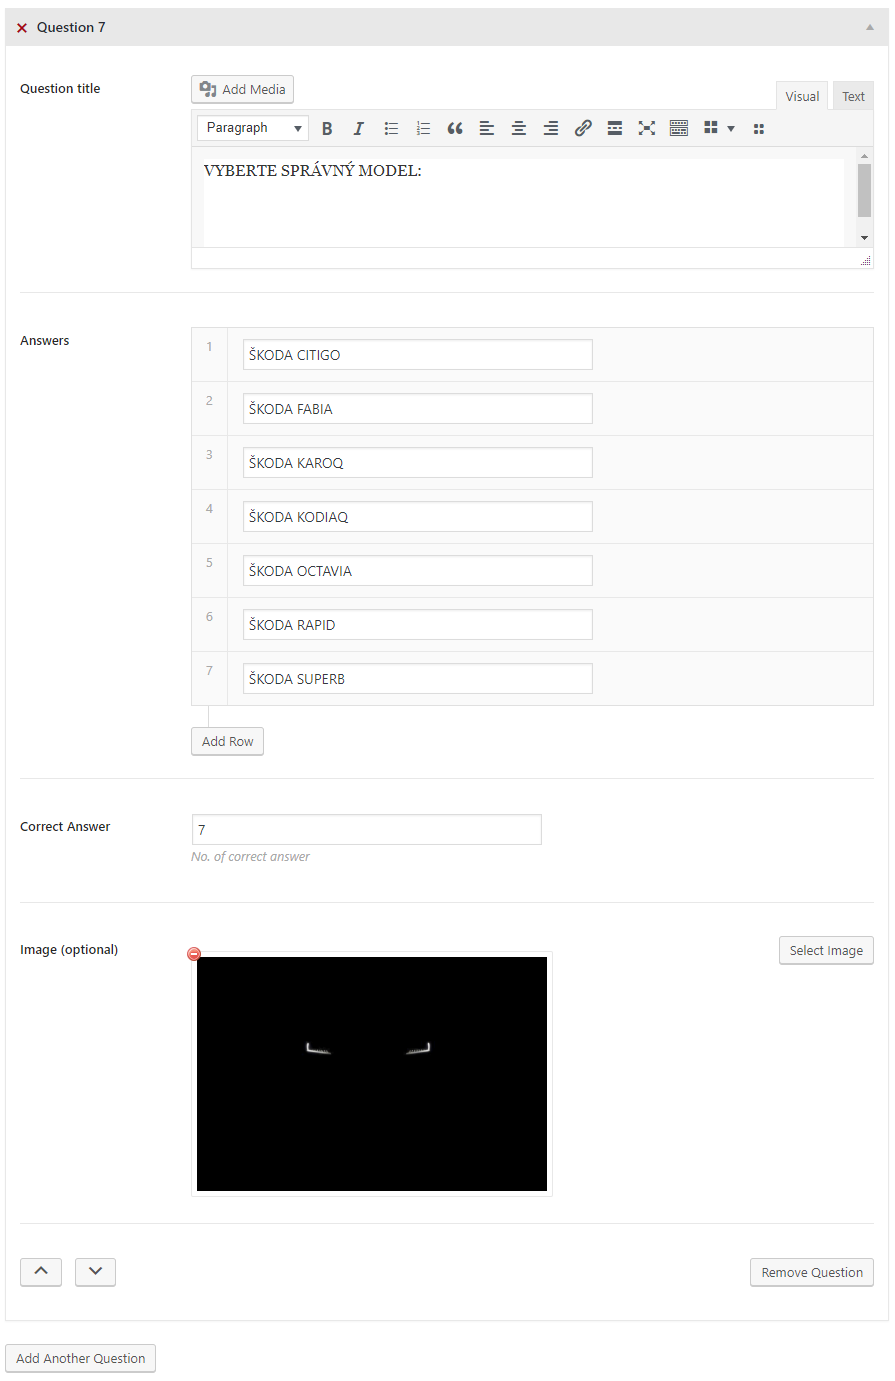
This section can contain a number of subsections - each one representing a single question and answer. You'll also have to enter the number of correct answers. There's also an image field, which is optional. If you scroll down to the end of the Questions section, you'll find a button for adding a new question. Each of the questions can be also removed. The list of questions supports ordering so you can drag & drop questions or use arrows to change the sequence.
Question title
Here you'll enter the question itself or some instructions to let the user decide the correct answer.
Answers
This subsection makes it possible to enter a number of answers. Just make sure you insert one correct answer among them. If you put your mouse cursor over one of the answers a button with a cross icon appears - this one can be used to remove the corresponding answer. At the bottom of the subsection, you can also notice there is a button labeled „Add row“ - useful for adding a new answer.
Correct Answer
In this field, you have to enter a number identifying the correct answer from the Answers subsection. Please notice the answers you entered in the before step are automatically numbered, so use the appropriate number.
Image (optional)
The title of this field is self-explanatory - here you can insert an image from the Media library, which is then publicly displayed along with the questions and answers. There's probably just a little note worth mentioning - make sure the name of the image doesn't contain the correct answer, because some of the more capable users may discover it and use it to cheat the Quiz.
Finishing the setting of Quiz
So now we should have all the fields filled in and we're good to go. Let's publish the Quiz by clicking the blue button in the right panel or save the Quiz as a draft if our work is not done yet and we're going to return to editation later. Right after publishing, we'll just write down the ID (number) of the Quiz. You can find the ID in the URL of the currently edited Quiz. Just find part of the URL starting with „post=“ and immediately followed by a number. Just to make sure below is an example of the URL with Quiz ID:
/wp-admin/post.php?post=13703&action=edit
13703 - this is the number we'll need in the next step.
Inserting Quiz to a Page or Post
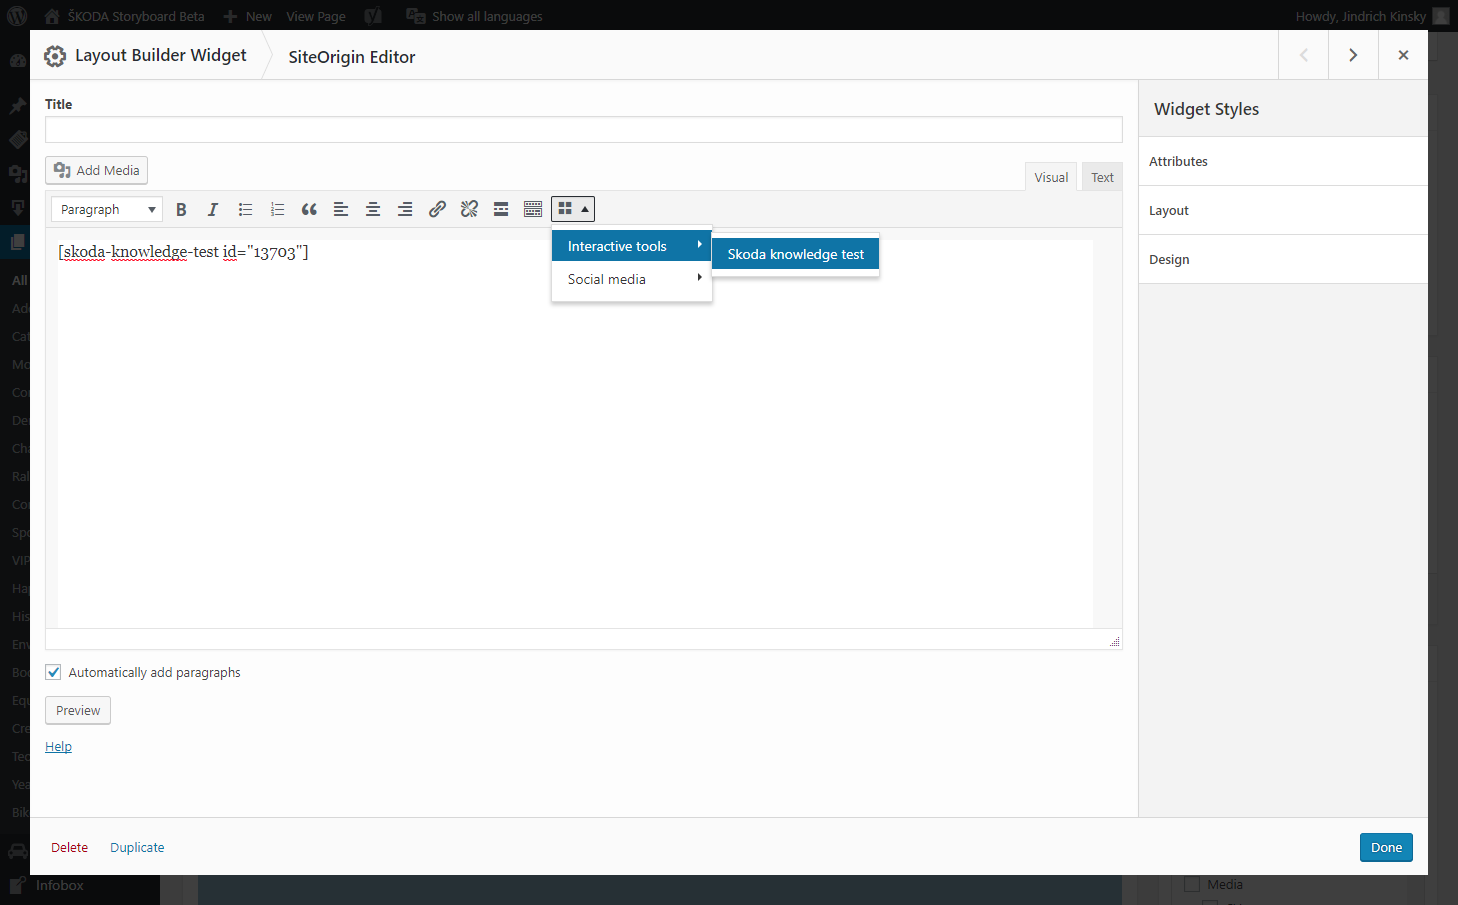
We'll assume you're already familiar with editation of Pages and Posts. Let's just create one and use the Quiz ID and shortcode to insert our Quiz and make it available for visitors from the website front end. We can do that by using the Layout Builder and inserting SiteOrigin Editor. Proceed to SiteOrigin Editor block editation. Next, we'll just use the button on the right to insert a knowledge test (Quiz).
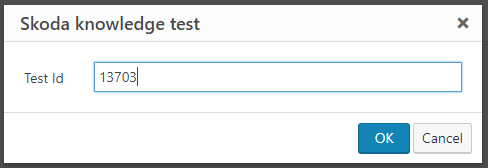
We'll be asked to enter the Test ID we've written down previously (see above) - let's just do that and continue by clicking the blue OK button.
Duplicate Quiz
Any quiz can be duplicated using the „Duplicate“ button in the quiz list even if a different author creates it or is in a different language.
